
Studio 2: Specialisation Project Breakdown
- Sara Eriksson

- Aug 20, 2018
- 8 min read
The Specialisation Project consisted of researching selected topics that were of benifit to one's development in Animation and producing a final deliverable showing what was learnt.
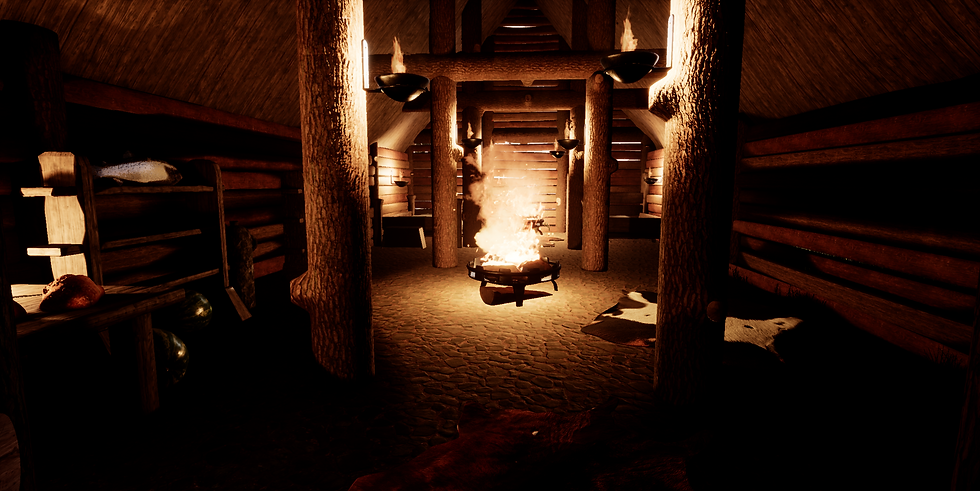
I personally chose to learn how to use Mudbox, how to better understand Unreal, how to Vertex Paint, how to create PBR shaders in Maya and Unreal, and how to better model in Maya. My final deliverable consisted of modelling a Viking House Environment on a platform.
Final Deliverable:
Showreel:
WORKFLOW:
I began this Project by breaking down what I wanted to learn. After watching some tutorials and modelling a few things, I began creating grey boxes of my viking scene. After this, I created assets while continuing to watch tutorials when relevant. I found a extensive list of PBR textures and created a heap of PBR materials in Unreal. Finally I compiled all my assets into Unreal and created the Environment. Lighting and Camera animations were the final step before editing and exporting in After Effects.


Research:
Introduction to Mudbox 2015 COURSE:

https://app.pluralsight.com/library/courses/introduction-mudbox-2015-1607/table-of-contents
This was an in depth 3 ½ hour Pluralsight course on the basics of Mudbox 2015. Although this Course was slightly outdated, the interface and options that he taught were not different from the 2018 version. The Course was divided up between 28 Tutorials that each clearly executed the topic at hand. Although this Course was focused at creating a ‘plastic monster action figure’, something that I did not create, I used however the skills that I was taught to create pieces that suited the subject matter that I am interested in.
Firstly I learned the general interface, how to move/scale/rotate, how to use the sculpting tools and how to import meshes from maya into Mudbox. After this I learnt how to Retopologise by exporting the high poly mesh from Mudbox into Maya, then making the mesh ‘Live’ and drawing over the mesh using the ‘Quad Draw Tool’ to create a new Low Poly Mesh. After this I learned that you then export this new mesh back into Mudbox and continue sculpting the surface detail. I Learned how to create my own vector displacement maps by sculpting detail onto a plane, then exporting it out as a vector displacement map and being able to use that as either a stencil or a stamp (this was very cool).
I learnt how to paint textures in Mudbox by using the pain tools and paint layers, as well as creating other paint layers such as Specularity ect. I learnt how to import updated UVs from Maya into Mudbox. I learnt how to generate a normal map and then bake it onto the low poly mesh, bring the object back into maya and have all the textures and maps come with it, all ready to be rendered.
Below are some of the creation I made alongside this Course:
This was my very first attempt at Sculpting, and I now know that I can also make this into a Vector Displacement Map if I flatten the edges.

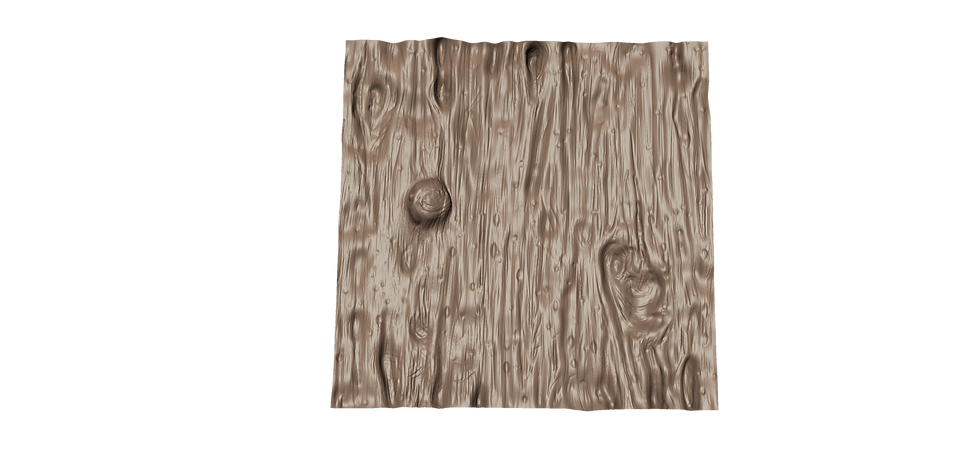
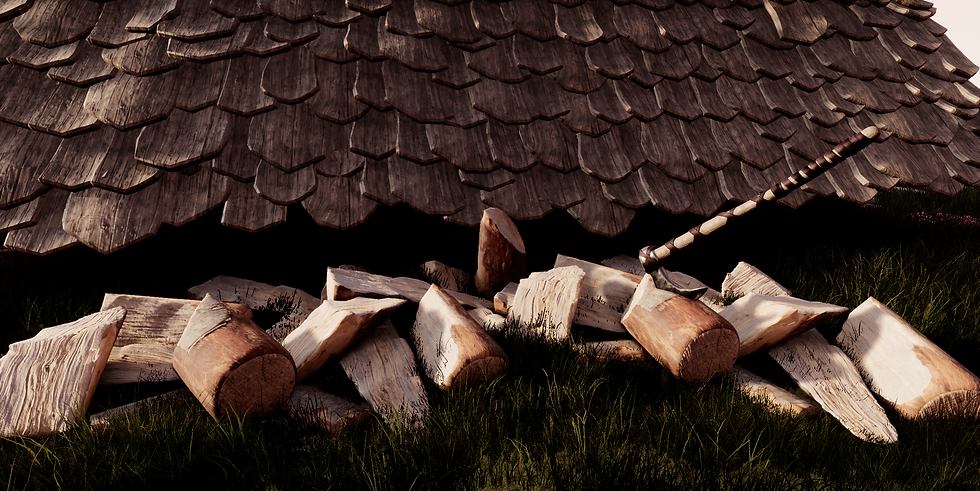
This was my attempt at sculpting a Log. I modeled a low poly version of this in Maya, then exported it into Mudbox. From there I subdivided the model and created a high poly mesh which a played with to create the most exaggerated shapes. I then exported that new high poly model back into Maya and retopologised it so that the low poly mesh fit over the high poly mesh. I exported that mesh back into Mudbox and continued sculpting the finer details in sculpt layers. I painted the log in Mudbox using its paint tools, then I finally I exported the finished mesh back into maya and baked the high poly textures onto the low poly mesh. Unfortunately the model does not look good in Maya, but i think it looked pretty awesome in Mudbox.

I used the same process to model the rocks as I did with the Log, except I used allot more sculpt layers with this one.
Modelling Wraps in Maya:
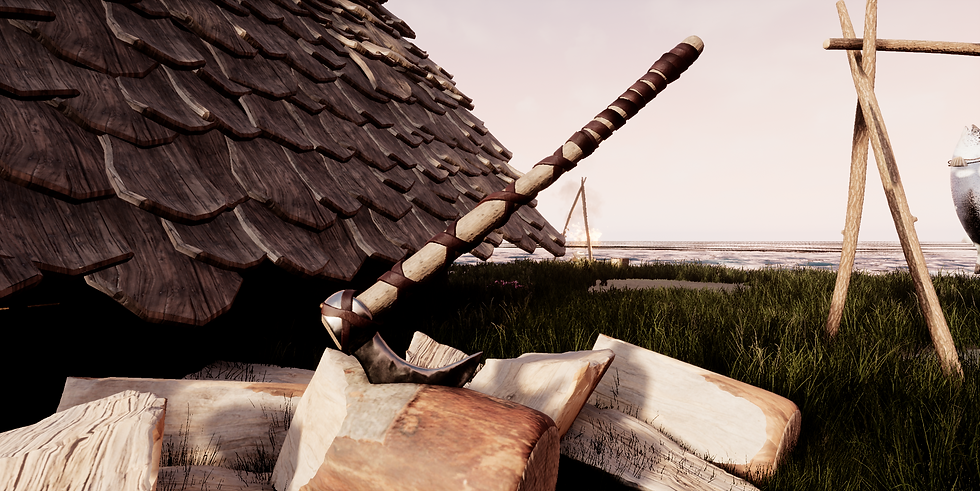
This tutorial showed me how to model wraps that follow the shape of an object. Firstly you duplicate the mesh you want to wrap around, then you cut the path of the wraps using the multi-cut tool. After this, you delete any edges that are intersecting at a point, then you go 'Modify, Convert, Polygon Edges to Curve'. You can now delete the mesh and then duplicate the curve and move it down or up to your desired distance. Then select both Curves and go 'Curves, Rebuild'. Then Edit the curves as necessary. Then Select the curves again and go 'Surfaces, Loft', this will create the wrap mesh. from here it is allot of editing to get the wraps to suit what you want. then Extrude the wraps to give some depth (you may need to reverse the faces after this, 'Mesh Display, Reverse'. Then add in edge loops to the top and bottom of the wrap and you can hit the 3 key. more tweaking if necessary, then DONE!
I used what I learnt in this Tutorial to create the wraps around this axe handle:

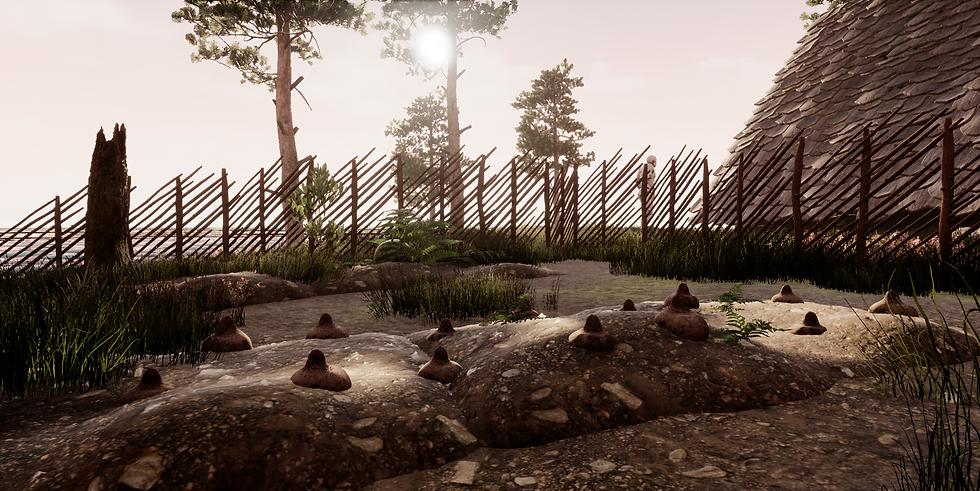
Shattered Rocks:
This was a very simple yet effective tutorial on how to create shattered rocks. This consisted of creating a high poly rock using the soft selection tool and the sculpting tools in Maya. Then you delete the history of the rock and while its selected, go into the FX tab and click Effects, Shatter. Bring up the Shatter menu in the solid shatter tab and tweak the settings to suit how many rocks you want and how jagged the edges should be. And that's it essentially.
Below are the rocks and even logs I made using this method:
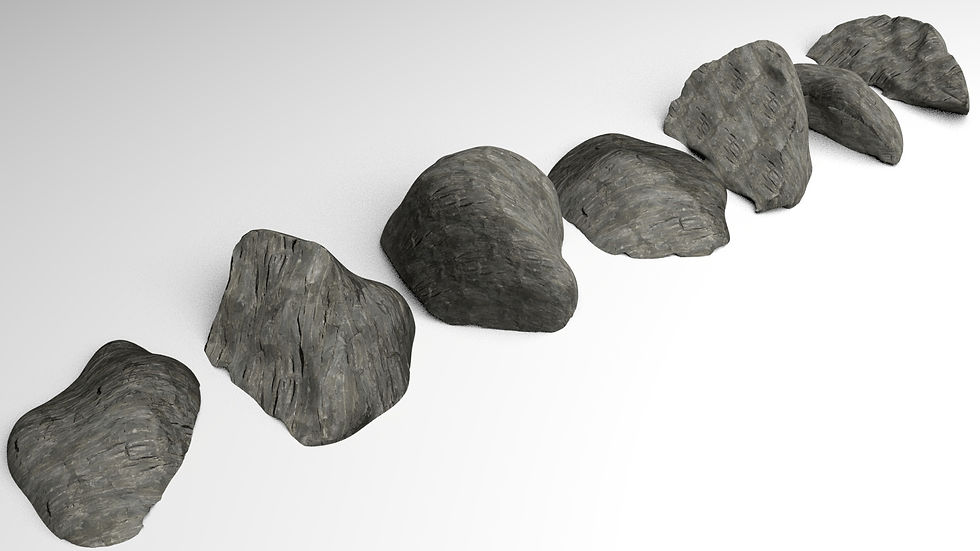
I played allot with the orientation of the rocks and the pivot points so that when I bring the rocks into Unreal I wont have any issues with the axis being wrong.

As a note, UVing these models were very difficult as the mesh becomes very high poly.

With the Logs, it was firstly just an experiment to see if it would even work, but it did. I made the shatter less jagged and only 3 pieces.
Making PBR Materials:
I learnt about Fresnel, how the outside or the furthur away (90% angle) has 100% reflectiveness, while the centre or the closer (0% angle) has 2-5% reflectiveness. However, the rougher the object/thing is, the less Fresnel it has due to the actual physical roughness of the object/thing as the light cannot reflect off it.
PBR means Physically Based Rendering, which means that the object reacts to light and its surrounding in a realistic way.
Assigning Multiple Materials to One object:
Learnt that assigning materials to the UV's in Maya makes a big difference to the materials you can assign in Unreal. Depending on what materials are assigned to what UV's make it so that those UV's are affected in Unreal. This was very handy :)
Tiling in Unreal Engine:
By making a Texture Coordinate node in the graph editor of your material, you link it up to all the materials making it so that you can tile the texture as much as you want. I used this information in every material I ended up making.
Third Person to First Person in Unreal Engine:
This taught me how to change the third person set up to a first person set up in Unreal. Pretty simple, just changing the position of the camera in the character settings, and then add in a few nodes to make it so that the character moves with the mouse movements (so you don't see the characters face if you turn around). It took a little while to figure out where everything was, as the person giving the tutorial's set up in Unreal was very different to my own, so I had to find everything he was talking about.
Landscape material shader with different paint layers:
This tutorial was very simple in theory, where you set up once master landscape material where all the textures are embedded in that one material being connected up by a 'Layer Blend Node' and a 'Landscape Coordinate Node'. However it came with many struggles, even the comments expressed many issues (which fortunately I did not experience), however I had other issues where the paint layers would suddenly come up with errors and wouldn't work anymore resulting in all my painting work vanishing...
In the end, I ended up not using this information, rather using Vertex painting instead.
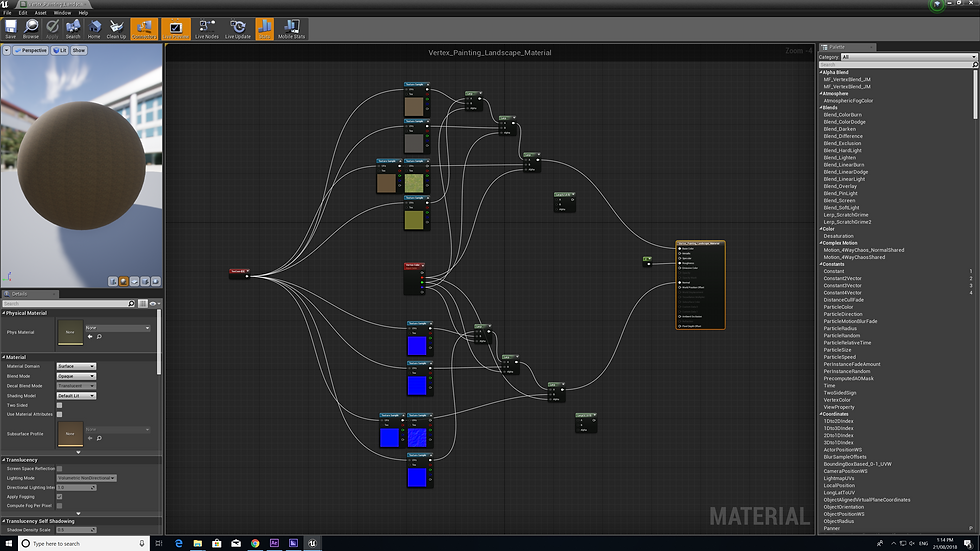
Vertex Painting:
This was a simple tutorial consisting of setting up vertex painting between 2 textures in Unreal. The tutorial only used a 'Vertex Colour Node' and a 'Linear Interpolate Node' or LERP for short. This is a very simple set up for vertex painting, however i don't know how to apply this to more than 2 textures and how to add in height maps and roughness maps. But as a general idea of how to set up vertex painting this was very good.
Below is a close up of the Graph Editor and the Node Setup which I made:

Vertex Painting:
This tutorial was allot more in depth and used different nodes to the above tutorial. This tutorial used 2 Textures but only 1 Height map, this was to make it so that one texture sat in the cracks of the other. He also used a 'Vertex Colour Node' and 'Linear Interpolate Node' as well as a 'Multiply Node', 'Add Node', 'Power Node', 'Scalar Parameter Node', 'Colour Node', 'Clamp Node', 'Texture Coordinate Node' and finally a 'Vertex Normal World Space Node'. Wow. So yes this tutorial was much more in depth. However it works well, but still doesn't tell me how to add more than 2 textures.
Below is a close up of the Graph Editor and the Node Setup which I made:


Vertex Painting:
This is a 3 part Tutorial, however I just watched the 2nd one about vertex painting. He created 3 textures which is exactly what I wanted to know. He simply set up the third texture by running it from the green channel in the 'Vertex Colour Node' through a LERP, into another LERP in its alpha channel, then adding in the thrist texture into the B channel of the LERP and then add the other textures LERP into the A channel. Then run that last LERP into the base colour.
Below is a close up of the Graph Editor and the Node Setup:

Models:


Challenges:
Troubleshooting was a challenge when I didnt know how to explain my problems, but after determination and research I was often able to figure out my issues. I had problems with importing my roof into Unreal, but I eventually solved that issue aswell by simply checking a few boxes when importing. However I never was able to figure out how to fix the light baking on my roof, it always worked out wrong unfortunately.
I have issues with unreal lagging because of the extensive amount of models (and them being high poly models) and the kite demo foliage. This could have been avoided of I have made my assets lower poly.
Appraisal of the finished project:
What worked, what didn’t work, and why?
Initially my workflow didnt work as I was going back and forth allot from maya to unreal, re UVing or Scaling etc. However after trial and error I figured out a pretty good workflow in terms of my modelling workflow and eventually I was able to quickly make assets for my Unreal Scene. I feel the PBR shaders worked really well though as well as my Vertex painting shader. Very happy with these.
How did it match with your expectations?
I had high expectations for myself as I have modelled a few Viking Scenes now, and although this one is definitely my best, I still feel as though it fell short in terms of the lighting and overall quality of the assets.
Future lessons & goals:
What can you do differently next time, what to repeat?
I would like to figure out my plan earlier on and figure out a set asset list from the get go rather than coming up with clutter as I go.
What else do you want to learn?
I want to learn how to create a game from the environment that I make, and how to do a bit of photogrammetry.


Comments